
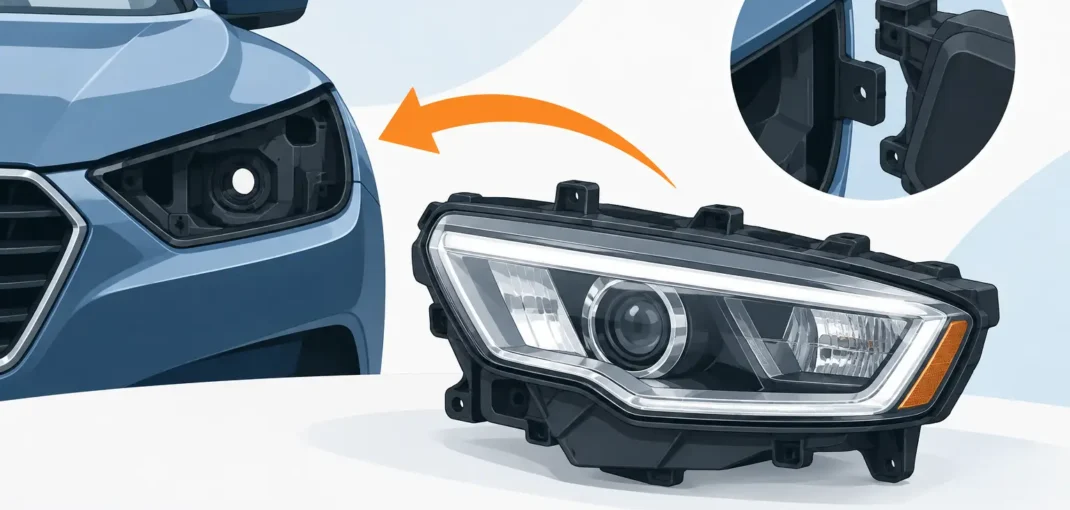
A cracked lens, moisture inside the assembly, faded reflector bowls, or broken mounting tabs can turn an otherwise good vehicle into a nighttime visibility problem. This replacement headlight housing guide helps you shop for the right assembly the first time, whether you need a factory-style replacement for a daily driver or a black-housing LED upgrade for your truck.
A headlight housing is more than the clear lens you see from the front. It holds the reflector or projector, mounting points, seals, bulb sockets or integrated LEDs, and adjustment hardware that controls where the beam lands. The correct replacement can restore the look of your front end and help deliver a clean, usable light pattern. The wrong one may not mount correctly, may leave gaps at the grille or fender, or may not connect to your vehicle’s factory wiring.
Start With Exact Vehicle Fitment
Year, make, model, and trim are the starting point, but they are not always enough. Many vehicles use different headlight housings within the same model year based on body style, production date, factory halogen versus HID or LED equipment, daytime running light setup, or package level. A Silverado 1500 and Silverado HD, for example, can look similar from a distance while using different lighting assemblies.
Before ordering, confirm the vehicle year, make, model, trim, and body style. Then compare the existing headlight’s shape, connector location, mounting-tab layout, and bulb configuration with the replacement listing. If your vehicle has a factory projector, an LED daytime running light strip, or a separate turn-signal section, verify that the replacement is built for that equipment.
Vehicle-specific fitment is the fastest way to narrow the choices. Select your vehicle before shopping whenever possible, then read the listed application carefully. A direct-fit housing should match the intended model-year range and installation position – driver side, passenger side, or a complete pair.
Check What Is Included
Some replacement headlight housings are sold as an assembly with bulbs, wiring pigtails, or LED components included. Others are a bare housing that reuses your existing bulbs, sockets, ballast, or modules. Neither option is automatically better. It depends on what failed and what you want to upgrade.
If only the lens is cloudy or a mounting tab is broken, a housing that accepts your current bulbs can be a practical repair. If you are replacing aged halogen assemblies and want a more modern front-end appearance, an LED-equipped or projector-style assembly may make more sense. Read the product details closely so you know whether bulbs and electronics are included before installation day.
Replacement Headlight Housing Guide: Choose the Right Style
The best housing style balances visibility, appearance, and the way you use your vehicle. Factory-style chrome housings are a strong choice when you want a clean OEM-inspired look. They work especially well for repairs, fleet vehicles, and owners who prefer the original appearance.
Black housings bring a more aggressive, updated look to many trucks, SUVs, and Mustangs. Smoked or tinted lenses can add a custom finish, but lens darkness is a real trade-off. A heavily smoked lens may reduce visible light output and may not be legal for on-road use in every location. If night driving is a priority, choose a clear lens with a black interior housing instead of assuming darker always looks better.
Projector housings use a focused lens to shape the beam, while reflector housings use reflective surfaces behind the bulb. Projectors can provide a more defined cutoff when the assembly and light source are designed to work together. Reflector-style replacements can be an economical direct-fit option and often preserve the original bulb setup.
LED headlight assemblies are popular because they offer a modern appearance, quick illumination, and a crisp white color temperature. However, an LED housing should be treated as a complete system. Look for vehicle-specific wiring compatibility, properly sealed construction, and a beam pattern designed for the vehicle. Installing an LED bulb into an old housing is not the same as installing an assembly engineered around LED lighting.
Lens Color, Housing Color, and Road Use
Do not confuse lens color with housing color. The lens is the outer cover that light passes through. The housing is the interior finish behind it. A clear lens with a black housing keeps the custom look while allowing more light through than a smoked lens.
For vehicles driven on public roads, check your state and local requirements for lighting color, lens tint, reflectors, and beam performance. Aftermarket lighting can be a great upgrade, but it still needs to be aimed correctly and used responsibly. A sharp-looking assembly is not worth reduced visibility or glare for oncoming drivers.
Inspect the Old Housing Before You Buy
A quick inspection can prevent you from replacing the wrong part. Condensation after a car wash or a rainy day does not always mean the housing has failed. A small amount of temporary fogging can clear as the assembly warms up. Standing water, repeated moisture, corrosion on the bulb connections, or visible cracks point to a seal or housing problem.
Look closely at the mounting tabs. Even a small crack can let the assembly move, creating uneven panel gaps and a beam that shakes over bumps. Check the bulb sockets and connector pins for melted plastic, discoloration, or corrosion. Heat damage may mean you need to replace more than the housing, especially if an incorrect bulb wattage or poor electrical connection caused the issue.
Also inspect the opposite headlight. If one original lens is hazy and the other is yellowed, replacing a pair can give your vehicle a more even appearance and more consistent output. Replacing one side is reasonable after collision damage or a single failed assembly, but mismatched lens clarity is easy to notice on the road.
Plan the Installation Before Removing Parts
Many direct-fit headlight housing replacements are manageable for capable DIY owners, but access varies by vehicle. Some cars allow removal from the top of the engine bay. Many trucks and SUVs require removing the grille, upper trim, bumper cover, or wheel-well fasteners to reach all mounting points.
Disconnect the battery if you will be handling exposed wiring or powered lighting modules. Protect painted surfaces with a clean towel, and keep track of clips, bolts, and screws as they come off. Do not force the old housing out. A hidden fastener or retained alignment pin is common, and pulling too hard can damage the grille, fender edge, or new assembly.
Before fully reinstalling trim, connect the replacement housing and test the low beams, high beams, turn signals, parking lights, daytime running lights, and any marker lights. This is the right time to catch a loose connector or incorrect bulb transfer. Once every function works, secure the assembly evenly and confirm the gaps around the hood, grille, and fender look consistent.
Aim Your New Headlights After Installation
Even a direct-fit housing can need adjustment. Headlight aim changes when an assembly sits slightly differently than the original, when suspension height has changed, or when the vehicle is loaded differently. Poor aim can put light too low in front of the vehicle or send glare into other drivers’ eyes.
Park on level ground facing a flat wall and use the factory adjustment points to make small changes. Consult your vehicle owner’s manual or a qualified installer for the correct aiming procedure and height specifications. Do not rely only on how bright the lights look from the driver’s seat. The goal is a controlled beam pattern that reaches the road without creating glare.
Shop for a Housing That Solves the Real Problem
The lowest-priced option is not always the best value if it lacks the features your vehicle needs. Prioritize confirmed fitment, correct connector style, durable mounting points, weather sealing, and the lighting configuration you actually want. Then choose the finish that matches your build, whether that means stock-style chrome, black housings, clear lenses, or an LED-forward upgrade.
Car and Truck Zone makes it easier to sort replacement lighting by vehicle application, model-year range, component type, and housing finish. That matters when you are shopping for a Ford truck, Chevy Silverado, GMC Sierra, Tahoe, Yukon, Mustang, or another vehicle with multiple lighting variations across generations.
A properly matched replacement headlight housing restores more than the front-end look. It gives you a secure mounting point, a clean lens, and a better foundation for safe nighttime driving – so take the extra minute to verify fitment before you order.