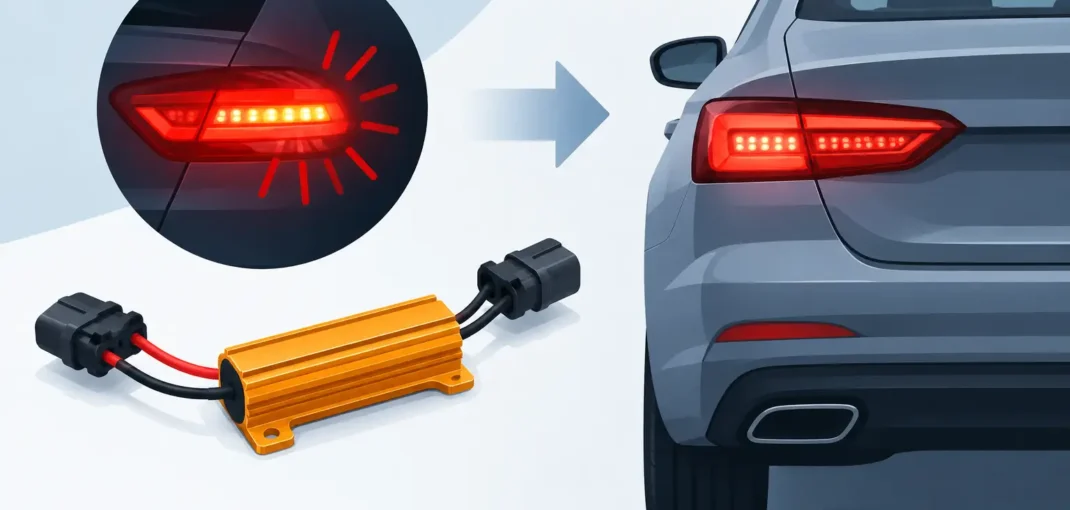
A new set of LED taillights can sharpen the look of your truck, SUV, or car in one afternoon. Then you hit the turn signal and find the dash indicator blinking twice as fast as normal. That fast flash is called hyperflash, and LED taillight resistors are one common way to correct it.
For many vehicle owners, resistors are the missing piece between a clean LED lighting upgrade and a warning that something is wrong. The right setup depends on the vehicle, the taillight design, and whether the new lights already include built-in load correction. Before adding anything to the wiring, make sure you know what problem you are solving.
Why LED Taillights Can Cause Hyperflash
Factory turn-signal systems are designed around incandescent bulbs. Those bulbs draw a relatively high amount of electrical current. Your vehicle’s flasher circuit uses that electrical load to determine whether a turn-signal bulb is operating normally.
LEDs use much less power. That efficiency is one reason they produce bright light with less demand on the electrical system, but it can also make the vehicle think a bulb has burned out. In response, the turn-signal indicator may flash rapidly, a bulb-out message may appear, or both can happen.
Hyperflash usually affects the turn-signal function, not the brake-light or running-light function. If your new LED taillights do not illuminate at all, are dim, or behave inconsistently, a resistor may not be the answer. Check the connector, ground, fuse, pin alignment, and vehicle-specific fitment first.
What LED Taillight Resistors Do
An LED taillight resistor adds electrical load to the circuit. It imitates part of the power draw of an incandescent bulb so the factory flasher reads the circuit as normal. In most applications, this restores the standard turn-signal flash rate.
The common aftermarket option is a 50-watt, 6-ohm load resistor. It is frequently used for a turn-signal circuit that previously operated a standard incandescent bulb. Depending on how the taillights are wired, you may need one resistor for each side of the vehicle, or one for each affected turn-signal circuit.
That detail matters. A pair of taillights may have separate left and right turn-signal wiring, so correcting only one side can leave the other side hyperflashing. Some vehicles also use rear turn signals that share functions with the brake lights, while others have dedicated amber turn signals. Always match the resistor installation to the wiring layout of your specific vehicle.
Check Whether Your Taillights Already Have Load Correction
Not every LED taillight upgrade needs external resistors. Many vehicle-specific LED taillight assemblies include internal resistors, built-in circuitry, or another anti-hyperflash solution. Adding external resistors when they are not needed can create unnecessary heat and extra wiring work.
Read the product description and installation notes before ordering accessories. If the taillights are labeled as plug-and-play, that does not always guarantee they are hyperflash-free, but it is a good place to start. Look for terms such as “built-in resistors,” “error-free,” “CAN bus compatible,” or “anti-hyperflash.”
A vehicle may also have a body control module that can be programmed for LEDs, or an electronic flasher relay that can be replaced with an LED-compatible version. These options can be cleaner than load resistors when they are available. However, they are not universal. Many newer trucks do not use a simple plug-in flasher relay, and module programming may require equipment or professional service.
Choosing the Right Resistor Setup
The correct resistor is not based only on whether your vehicle is a Chevrolet Silverado, GMC Sierra, Ford F-Series, Tahoe, Yukon, or Mustang. Model year, wiring design, and the specific lighting assembly all affect the answer.
Start by confirming that hyperflash appears after the LED taillight installation. Then identify which function causes it. Activate the left and right turn signals separately, test the hazard lights, and check the brake lights and parking lights. If only the turn signals flash fast, load correction is likely relevant.
A proper setup should account for these four points:
- The resistor’s ohm and watt rating
- The number of affected signal circuits
- Whether the taillight has a separate or combined brake/turn signal
- Whether the vehicle already has built-in or programmable LED correction
Avoid guessing based on a universal kit description alone. Universal resistors can work well, but installation location and wiring connection still need to match your vehicle. Select your vehicle by year, make, and model when shopping for replacement taillights, then review the product details for resistor requirements.
Where to Install LED Taillight Resistors
Load resistors get hot during use. This is normal because they turn electrical energy into heat to mimic the load of an incandescent bulb. That heat is also why installation quality matters.
Mount each resistor to a clean metal surface away from plastic taillight housings, painted surfaces, wiring insulation, fuel-system components, and anything that can be damaged by heat. Do not tape a resistor to the back of the taillight, tuck it inside the housing, or leave it loose behind the panel.
Most resistor kits connect in parallel with the turn-signal wiring, not in series. In simple terms, the resistor is connected between the turn-signal positive wire and the ground wire while the LED taillight remains connected normally. If you wire a resistor in series, the signal may not operate correctly.
Because wire colors can vary by vehicle and aftermarket harness, verify the circuit with a wiring diagram or multimeter instead of relying on color alone. Crimp connectors may be included with a kit, but weather-resistant heat-shrink connections offer better protection in areas exposed to rain, road spray, and salt. Secure the harness after testing so it cannot rub on sharp metal or contact hot exhaust components.
Test the Lighting Before Reassembling the Truck or Car
Before reinstalling trim panels or fully tightening the taillights, test every rear-light function. Turn on the parking lights, press the brake pedal, activate each turn signal, and test the hazard flashers. If possible, have another person stand behind the vehicle while you check the lights.
Watch for more than flash speed. Confirm that both sides illuminate at equal brightness, the brake lights do not override the turn signal incorrectly, and no warning message appears on the dash. If the resistor becomes extremely hot during a short test, that is expected to a degree, but make sure it is mounted securely on metal with clear space around it.
If hyperflash remains after installing the resistor, stop and recheck the connection point. A poor ground, incorrect wire identification, resistor failure, or a vehicle with a different monitoring system can cause the problem. Do not keep adding resistors until the flash rate changes. Extra resistance is not automatically a better fix and can increase heat without correcting the underlying issue.
Resistors vs. LED Flasher Relays and Programming
Load resistors are widely used because they work on many vehicles and can be installed alongside a replacement taillight upgrade. The trade-off is heat and lost efficiency. Your LEDs still use less power, but the resistor consumes extra power to satisfy the factory circuit.
An LED-compatible flasher relay avoids that added heat on vehicles that use a replaceable relay. Programming the body control module can also be a better long-term option on certain newer vehicles. Still, either option depends on vehicle design, available parts, and access to the correct programming tools.
For a straightforward taillight replacement on a truck or SUV, a correctly mounted resistor kit is often the practical answer. For a full LED conversion involving front signals, rear signals, marker lights, and other circuits, it may be worth checking whether a relay or programming solution will reduce the number of resistors needed.
Shop the Taillights First, Then Match the Fix
The best installation starts with a taillight assembly designed for your vehicle, not a universal lighting guess. Confirm the model-year application, lens color, housing finish, LED functions, connector style, and whether load resistors are included before placing an order.
Car and Truck Zone makes it easier to narrow down vehicle-specific LED taillights for popular cars, SUVs, pickups, and heavy-duty trucks. Once you have the right assembly, you can address hyperflash only if your vehicle actually needs it. A clean install, secure resistor mounting, and a complete function test will keep your new rear lighting looking sharp and signaling the way it should.