
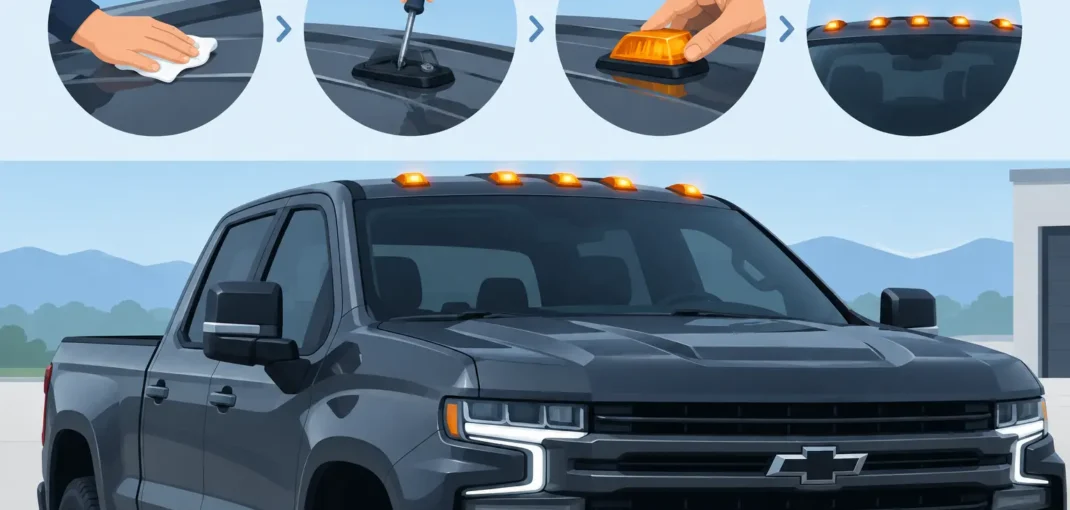
A set of five amber cab lights gives a Silverado a heavy-duty look that stands out day or night. But to install Silverado cab roof lights correctly, the job needs more than a drill and a wiring tap. Accurate placement, careful headliner work, weatherproof sealing, and a clean power connection determine whether the finished upgrade looks factory-installed or becomes a source of leaks and electrical problems.
This is a practical project for a capable DIY truck owner. Plan for a full afternoon, work slowly around the roof structure, and confirm that the lights are built for your exact Silverado generation before cutting into the cab.
Start With Silverado Cab Roof Light Fitment
Cab roof lights are not one-size-fits-all. Silverado 1500, 2500HD, and 3500HD trucks can have different roof contours, cab widths, headliner designs, and wiring paths depending on the model year and cab configuration. A kit designed around a 2007-2013 Silverado may not sit correctly on a 2019-2026 body style, even if the lights look similar in photos.
Before ordering or opening the package, verify the model year, trim, and whether the truck is a regular, double, or crew cab. Check the number of lights included, the mounting gasket design, wire length, and whether the kit includes a wiring harness, connectors, screws, and templates. Most traditional kits use five amber marker lights across the leading section of the roof. Some LED kits use smoked lenses for a more blacked-out appearance while still illuminating amber.
If you are selecting parts through Car and Truck Zone, use the vehicle fitment tools first. A vehicle-specific kit reduces the amount of measuring, trimming, and guesswork required during installation.
Tools and Supplies to Have Ready
Gather everything before removing the headliner. You will typically need a measuring tape, masking tape, a marker, center punch, drill, step bit or appropriately sized drill bits, trim removal tools, screwdriver, socket set, wire stripper, crimping tool, heat-shrink connectors, electrical tape, zip ties, and automotive-grade silicone or butyl sealant.
A multimeter or test light is also worth having. It lets you confirm which wire powers the parking lights instead of relying on wire colors that may vary by model year or aftermarket modifications.
For the cleanest result, use rust-inhibiting primer or touch-up paint on every exposed bare-metal hole before the lights go on. Roof holes are hidden under the lamp bases, but untreated steel can still corrode underneath the gasket over time.
Map the Light Locations Before You Drill
The layout is the part everyone sees. Park the truck on level ground, wash the roof, and remove dirt or wax where masking tape will be applied. Use tape to create a centerline from front to rear, then identify the left and right positions for each marker light.
Most cab light kits include a paper template or a recommended spacing measurement. Follow the instructions supplied with that specific kit rather than copying measurements from another Silverado. The roof stamping, windshield edge, and cab width can change from one generation to another.
Place the lights or template on the taped roof before drilling. Step back several feet and look at the truck from the front. Confirm that the outer lights follow the roof shape evenly and that the center light sits on the true centerline. Measure each location twice from a fixed reference point, such as the top windshield molding or roof edge.
Do not place lights so close to a roof brace, sunroof track, antenna wiring, or roof-mounted equipment that you cannot access the hardware from inside. On some trucks, the ideal visual position may need a slight adjustment to avoid structural supports. That is a worthwhile trade-off. A light that is off by a fraction of an inch is far less noticeable than a hole drilled through something it should not have touched.
Lower the Headliner Carefully
Disconnect the negative battery terminal before working on the electrical system. Then remove enough interior trim to lower the front portion of the headliner. Depending on the Silverado, that can include sun visors, overhead console components, grab handles, A-pillar trim, and upper door weatherstripping.
Work carefully around A-pillar trim. Many Silverado models use curtain airbags in this area, and the wiring must not interfere with airbag deployment. Do not probe, cut, or secure wiring to any airbag components. Keep the harness behind or away from the deployment path and use existing factory routing where possible.
You generally do not need to remove the headliner entirely. Lowering the front section enough to see the roof structure and guide wires is usually sufficient. Support it gently so it does not crease or bend. A creased headliner can be difficult to restore once it is reinstalled.
Drill, Protect, and Seal the Roof Openings
With the headliner lowered, double-check the underside of every marked location. Make sure there are no braces, harnesses, or components directly below the drilling points. Use a center punch to prevent the bit from wandering across the roof panel.
Start with a small pilot hole. Drill slowly and use light pressure. Once the pilot hole is through, enlarge it only as much as the light mounting screw or wiring grommet requires. For lights with a separate wire pass-through, a step bit provides more control than forcing a large standard bit through thin sheet metal.
Remove metal shavings from both sides of the roof. Apply a thin coat of primer or touch-up paint to the bare edge of each hole and allow it to dry as directed. This small step helps protect the roof from rust, especially on trucks that see winter road salt, rain, snow, or frequent washing.
Run each light wire through its opening before fastening the lamp. Position the supplied gasket between the light base and roof. If the kit’s gasket feels thin or uneven, apply a modest bead of automotive-grade sealant around the wire opening and mounting holes. Do not overload the area with sealant. Excess can squeeze out around the light and make the installation look sloppy.
Tighten mounting screws evenly. The goal is a snug seal, not a crushed plastic housing or dented roof panel. Once all five lights are mounted, inspect their alignment again from outside before moving to wiring.
Wire the Cab Lights to the Parking Light Circuit
Most Silverado cab roof lights are wired to illuminate with the parking lights and headlights. This keeps the truck’s exterior lighting consistent and avoids leaving the roof lights on when the vehicle is parked.
Connect the individual positive leads into the harness according to the kit instructions. Use sealed crimp connectors or solder-and-heat-shrink connections rather than twisting wires together and covering them with tape. Roof wiring lives in an area exposed to temperature changes, vibration, and condensation, so weak connections eventually fail.
Route the main power wire along an existing factory harness toward the driver-side A-pillar or another approved access point. Secure it with zip ties, leaving enough slack that the wire is not stretched or pinched when trim is reinstalled. Avoid sharp metal edges and moving parts.
Use a multimeter to identify the parking light positive wire at the chosen connection point. Connect the cab light power lead to that circuit with a quality connector, and connect the ground lead to a clean factory ground point or bare metal secured with a proper ring terminal. If the kit includes an inline fuse, keep it installed. If it does not, follow the kit’s electrical requirements and consider a fused power connection for added circuit protection.
Before reinstalling interior trim, reconnect the battery and test the lights. Turn on the parking lights, headlights, hazards, and high beams. The cab lights should come on with the parking lamp circuit and should not flicker, dim unexpectedly, or affect other exterior lights.
Reassemble and Check for Leaks
After the electrical test, disconnect the battery again if necessary and reinstall the headliner, visors, trim panels, weatherstripping, and overhead console components. Make sure no harness is trapped between trim pieces and no clips were left loose.
Give the roof lights a final water check after the sealant has cured. A gentle hose test is enough. Run water over the light bases and inspect the inside of the cab around the headliner for moisture. Avoid a high-pressure washer directly on fresh seals until the product has fully cured.
If you see a leak, remove the affected light, clean away the failed sealant, dry the area completely, and reseal it. Do not ignore even a small drip. Water can stain the headliner, corrode wiring, and create a bigger repair later.
A Clean Install Makes the Upgrade Worth It
Cab roof lights are a classic Silverado upgrade, especially when paired with updated LED headlights, smoked marker lenses, or a new grille. The difference is in the details: centered lights, protected drill holes, sealed bases, and wiring that follows the truck rather than fighting it.
Take the extra time to verify fitment and make every connection weather-ready. Your Silverado will get the heavy-duty style you want, with lights that look right and keep working when the weather turns.