
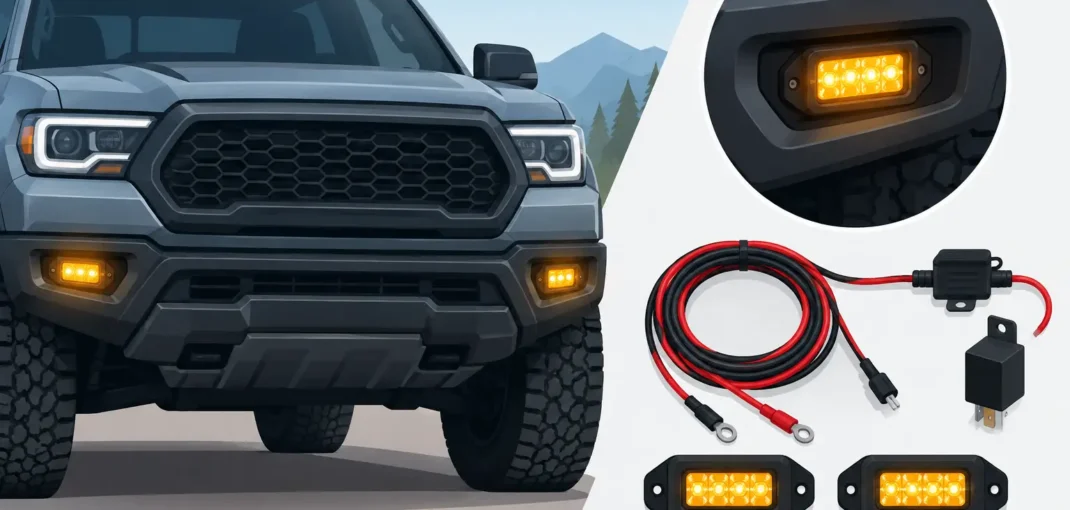
A new set of bumper lights can improve trail visibility, fill in dark areas below the headlight beam, and give a truck or SUV a more finished front-end look. Knowing how to wire bumper lights correctly matters just as much as choosing the right housing, beam pattern, and vehicle application. A clean install protects the lights, prevents electrical problems, and gives you reliable control when conditions get dark.
This guide covers the standard relay-and-switch method used for aftermarket LED fog lights, driving lights, and auxiliary bumper-mounted lights. Factory replacement fog lights may use a vehicle-specific harness and different connectors, so always confirm your year, make, model, and trim before starting.
Start With the Right Wiring Plan
Before mounting anything, decide how you want the lights to operate. Some owners want bumper lights to come on only with the high beams. Others want independent control from a dash switch for off-road use, job sites, or low-visibility weather. That choice determines where the relay trigger wire connects.
For most aftermarket auxiliary lights, do not run the light power wire directly through a small dash switch. High-output lights can pull more current than the switch or factory wiring was designed to handle. A relay lets a low-current switch control a higher-current circuit from the battery.
A basic bumper light wiring setup includes a battery connection, an inline fuse, a relay, a switch, two light outputs, and a solid ground. Many LED light kits include these parts in a pre-terminated harness. If yours does not, build the harness with wire rated for the current draw and the distance between the battery, relay, and lights.
You will typically need the following items:
- Bumper lights with mounting hardware
- A fused relay wiring harness or individual relay components
- Heat-shrink butt connectors or solder and heat shrink
- Wire loom, zip ties, and rubber grommets
- A multimeter or test light
- Basic hand tools, wire strippers, and a drill if a switch location needs one
Choose weatherproof connectors whenever the wiring sits behind the bumper, near the grille, or under the hood. This area sees water, road salt, mud, and temperature changes that can ruin a quick electrical connection.
How to Wire Bumper Lights With a Relay
A standard four-pin relay is usually labeled 30, 85, 86, and 87. Terminal 30 receives fused battery power. Terminal 87 sends power to the bumper lights. Terminals 85 and 86 control the relay coil, with one going to ground and the other receiving the switch or trigger signal.
Start by disconnecting the negative battery terminal. This prevents accidental shorts while routing power wires and making connections. Mount the relay in a dry, protected area under the hood, preferably near the battery but away from exhaust heat, moving belts, and sharp edges.
Run the main power wire from the positive battery terminal to the relay’s terminal 30. Install the inline fuse close to the battery, ideally within several inches of the positive terminal. The fuse protects the wire if it becomes damaged or shorted along its route. Do not install the fuse until all wiring is complete.
Next, connect terminal 87 to the positive leads for both bumper lights. If the lights are mounted far apart, use a split harness or make a protected Y-connection so each light receives its own positive lead. Keep wire routing behind the grille or along existing factory harness paths whenever possible.
Connect the negative wire from each light to a clean chassis ground near its mounting location. Remove paint, rust, or coating beneath the ground terminal so it contacts bare metal, then protect the finished connection from corrosion. A poor ground is one of the most common causes of dim, flickering, or intermittent LED lights.
For the control side of the relay, connect terminal 85 to a reliable ground. Run terminal 86 to your dash switch. The other side of the switch needs a 12-volt trigger source. You can use a switched ignition source if you want the lights to work only when the key is on, or a battery-fed source if you need the lights available with the vehicle off. Check local rules before choosing an always-on setup for road-going auxiliary lights.
Choose a Switch Trigger That Fits Your Use
The trigger source changes how the bumper lights behave. An independent switch gives you full control and is common for LED pods and off-road driving lights. It works well when the lights are intended for trails, work areas, or private property.
Tapping into the high-beam circuit can make the lights activate with the high beams. This is useful for driving lights designed to extend forward visibility, but it should be done with the relay trigger wire only. Never power aftermarket lights directly from the factory high-beam wire. The factory circuit may not support the additional load and can cause blown fuses, warning lights, or electrical module issues.
If you are installing replacement fog lights in an empty factory bumper opening, a vehicle-specific fog light harness is often the cleaner option. These kits may include factory-style connectors, a matching switch, and mounting hardware designed around the original light locations. Car and Truck Zone makes it easier to narrow down lighting options by vehicle fitment before you buy.
Mount and Route Everything Before Final Connections
Test-fit the lights before tightening the mounting bolts. Bumper brackets, grille openings, recovery hooks, winch mounts, and active grille shutters can all limit placement. Make sure the lights will not contact the bumper cover, radiator support, intercooler, or other components when the vehicle flexes.
Route wires away from heat, sharp metal, steering components, suspension travel, and moving fan assemblies. If a wire must pass through a metal panel, use a rubber grommet. Cover exposed sections with split loom and secure them every few inches with zip ties or factory-style clips.
Avoid routing the harness across the top of the radiator or loosely around the battery. It may look acceptable in the driveway, but vibration and heat will eventually rub through insulation. A few extra minutes spent securing the harness creates a cleaner install and makes future service easier.
Size the Fuse and Wire for the Lights
Use the light manufacturer’s listed wattage or amperage to select the fuse and wire size. To estimate current, divide total wattage by 12 volts. For example, two 36-watt lights draw roughly 6 amps together at 12 volts. Real vehicle voltage can be higher while charging, but this calculation provides a useful starting point.
Choose a fuse slightly above the expected operating draw, not dramatically larger. A fuse that is too large may not protect the wiring in a short-circuit situation. Many compact LED pod kits use a 10- or 15-amp fuse, while larger driving lights and light bars may require more. Follow the harness and light manufacturer recommendations when they differ from a general estimate.
Wire gauge also depends on the distance of the run. Short, low-current LED runs can often use 16-gauge wire, while higher-output lights or longer battery-to-bumper runs may need 14-gauge or 12-gauge wire. When in doubt, use a heavier gauge rather than undersizing the circuit.
Test the System Before Reassembling the Front End
With the lights mounted and every connection protected, install the fuse and reconnect the negative battery terminal. Turn on the switch or selected trigger source. Both lights should illuminate at full brightness without flickering, relay chatter, smoke, or hot wires.
If nothing happens, begin with the simple checks: verify the fuse, battery connection, relay orientation, switch power, and ground points. If one light does not work, swap its connector with the working side. If the problem moves with the light, inspect the light or its short lead. If it stays on the same side of the vehicle, inspect that side’s wiring and ground.
Check light aim after dark on a level surface. Fog lights should generally stay low and wide to reduce glare, while driving lights can aim farther down the road. Do not aim auxiliary bumper lights high enough to blind oncoming traffic. State and local lighting rules vary, especially for color, brightness, covers, and when auxiliary lights can be used on public roads.
Keep the Install Serviceable
A bumper-light install should look organized, but it also needs to be serviceable. Leave enough slack near each light to remove it for bumper work or replacement, without leaving loose loops that can snag. Labeling relay wires is worthwhile if you run several accessories, such as a light bar, grille lights, or ditch lights.
After the first week of driving, inspect the mounting hardware and wiring. Retighten brackets if needed, look for wire abrasion, and check that the grounds remain clean and secure. A properly fused relay harness, solid grounds, and vehicle-appropriate lights will give your truck or SUV the visibility upgrade you wanted without turning a simple bumper project into an electrical headache.