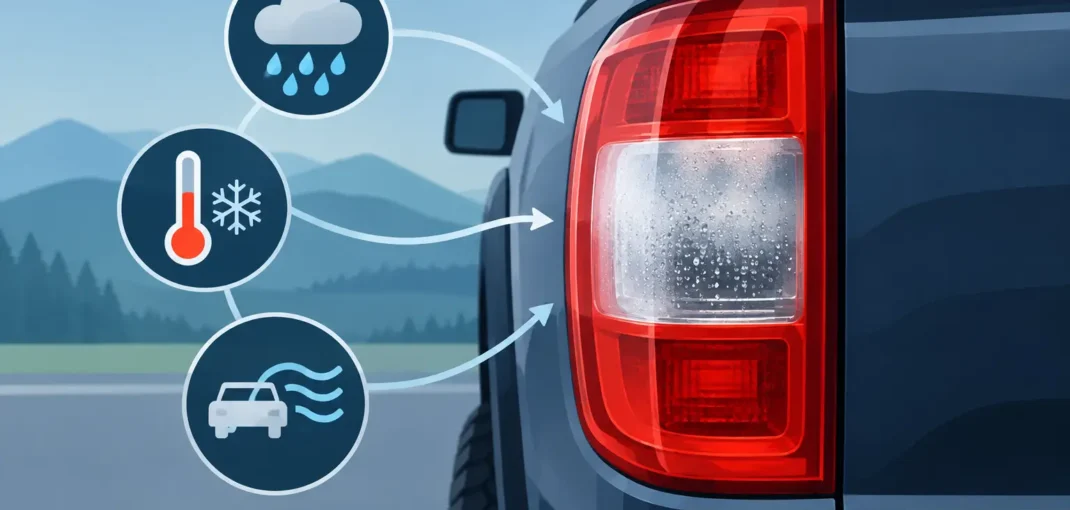
A clear taillight lens can fog up after a cold, wet drive, then look normal again by afternoon. That can be frustrating, especially on a Silverado, Sierra, Ford truck, SUV, or Mustang you work hard to keep looking sharp. So, what causes taillight condensation? Usually, it is warm humid air meeting a cooler lens inside the housing. But when the moisture stays, returns often, or turns into standing water, it can point to a seal, vent, lens, or housing problem that needs attention.
What Causes Taillight Condensation?
Taillight assemblies are exposed to major temperature swings. The bulbs, LEDs, internal electronics, and surrounding air warm up when the vehicle is running. Then rain, a car wash, cool night air, or a sudden temperature drop cools the outer lens. If humid air is inside the housing, that moisture can condense into a light haze or small droplets on the inner lens surface.
Many modern lights are vented by design. Those vents help equalize pressure as the assembly heats and cools. A small amount of temporary fogging can happen in a properly functioning light, particularly after heavy rain or washing your vehicle. If it clears after the lamps have been on or after a period of dry weather, it may not be a failure.
The difference is persistence. A taillight that stays cloudy for days, repeatedly collects heavy droplets, or has visible water pooling at the bottom is taking in more moisture than it can release. That is when you should inspect it instead of waiting it out.
Failed or Damaged Lens Seals
The lens-to-housing seal is one of the most common leak points. Factory sealant can age, shrink, or separate. On replacement lights, improper installation, poor-quality sealing, or a housing that was damaged during shipping or handling can create a small opening around the lens edge.
A tiny gap is enough. Water does not need a wide opening to enter a taillight assembly. Road spray and repeated washes can push moisture through a weak seal, and the water may only become obvious after it condenses inside the lens.
Cracked Lenses and Housings
A crack in the outer lens or rear housing can let in water directly. Some cracks are easy to spot after a backing accident, a dropped tailgate, or a hit from road debris. Others are hairline cracks near mounting tabs, screw holes, or the seam where the lens meets the housing.
Inspect the light closely in bright conditions. Remove surface dirt first, then look for cracks, chips, warped plastic, and broken mounting points. A damaged housing can also sit unevenly against the body, creating another route for water to enter.
Worn Gaskets, Bulb Sockets, and Wiring Seals
On assemblies with serviceable bulbs, the bulb socket or rear access cover may use a rubber gasket or O-ring. If that rubber is flattened, torn, brittle, missing, or installed out of position, moisture can enter from the back of the housing.
Check the wiring pass-through as well. A loose connector, damaged grommet, or missing dust cap can expose the inside of the light to moisture and road grime. This is especially common on older trucks and vehicles that have had trailer wiring, LED conversions, or previous lighting repairs.
Blocked or Damaged Vents
Vents are supposed to breathe, not invite water in. Dirt, mud, wax, debris, or aftermarket coating can block a vent and trap humid air inside the assembly. A torn vent tube or missing vent cap can have the opposite effect, allowing water to enter too easily.
If the vent is accessible, inspect it without forcing anything into the opening. Blasting compressed air at a vent can damage delicate vent material or push debris farther into the housing. A gentle visual inspection is usually the safer first move.
When Is Taillight Moisture a Real Problem?
Light fogging that disappears is different from water intrusion. Look for droplets that run down the lens, a water line in the bottom of the housing, or moisture that remains after several dry days. Those signs deserve a closer inspection.
Water inside a taillight can lead to more than a bad appearance. It can corrode bulb contacts, sockets, circuit boards, and connectors. On LED taillights, moisture can damage drivers or integrated electronics that are not designed to be serviced separately. You may notice intermittent operation, a warning light, flickering LEDs, rapid bulb failure, or dim output.
For safety, do not ignore a taillight that is visibly full of water or not operating correctly. Rear lighting helps other drivers judge your braking, turning, and position in bad weather and low light. If the assembly is compromised, repair or replace it before a small moisture issue becomes an electrical issue.
How to Find the Source of the Leak
Start with the simple checks. Confirm that the light is mounted squarely and that all screws, clips, and alignment pins are present. A loose assembly can flex while driving and allow water past a gasket or seam.
Next, remove the taillight if your vehicle design allows it. Check the rear cover, bulb sockets, seals, harness connector, and mounting area for moisture trails. White or green corrosion around terminals is a strong clue that water has been entering for a while.
If the housing looks dry from the rear, inspect the lens seam and the outer lens for cracks. A controlled water test can help, but use a gentle stream rather than a high-pressure nozzle. With the light installed, have someone watch behind the assembly while you run water over the lens and surrounding body seams. Avoid spraying directly at open connectors or removed bulb sockets.
Keep in mind that the leak may not be in the light itself. On some trucks and SUVs, damaged body seals, a loose tailgate-area trim piece, or a water path behind the lamp can direct water toward the housing. If one side is leaking and the other is dry, compare the mounting areas side by side.
Can You Dry Out a Condensed Taillight?
Drying the assembly can be useful for diagnosis, but it is not a lasting repair unless the source of moisture is fixed. Remove the light, take out any serviceable bulbs or rear covers, and allow the housing to air-dry in a clean, dry location. Do not bake the housing in an oven or use excessive heat. Plastic lenses can warp, seals can deform, and LED components can be damaged.
A low-temperature airflow source used carefully can speed up drying, but patience is usually safer. Once dry, inspect every gasket and seal before reinstalling the lamp. If the condensation returns after a proper dry-out, the housing has an active entry point.
Silica gel packs can temporarily reduce moisture during storage or diagnosis, but they will not correct a cracked lens, failed seam, or damaged gasket. They are not a substitute for repair.
Repair the Seal or Replace the Taillight?
It depends on the cause, the light design, and the condition of the assembly. A missing rear cap or worn bulb-socket gasket may be a straightforward repair. A clean, undamaged housing with a small seam issue may be repairable with the correct automotive-grade sealant, provided the lens can be resealed evenly and the venting system remains functional.
Replacement is usually the better option when the lens is cracked, the housing is warped, internal corrosion is present, or a sealed LED assembly has moisture-related electrical problems. Trying to reseal a heavily damaged light can cost time without solving the problem. It may also leave you with a light that looks cloudy or performs inconsistently.
When choosing a replacement, verify year, make, model, body style, and trim before ordering. Truck lighting can vary by model year, bed configuration, factory LED equipment, blind-spot hardware, and connector style. A direct-fit taillight helps avoid mounting gaps, wiring mismatches, and installation delays.
Preventing Condensation After Installation
Before installing a new taillight, inspect the vehicle-side mounting surface. Remove dirt and debris that could keep the housing from sitting flat. Transfer bulbs, sockets, or harness components carefully when required, and make sure each gasket is seated correctly before tightening the light.
Do not overtighten mounting fasteners. Excess pressure can crack plastic tabs, distort the housing, or create uneven pressure around a seal. After installation, test the running light, brake light, turn signal, reverse light, and any integrated LED functions before putting the vehicle back into regular use.
If you drive through deep water, use high-pressure washes often, or run your truck on muddy roads, inspect your lighting more regularly. Exterior upgrades should improve the look and function of your vehicle, not create another maintenance headache.
A little temporary fogging may be normal, but recurring condensation is your cue to act. Catching a weak gasket or damaged housing early can protect your wiring, preserve rear visibility, and keep your truck or car looking finished instead of waterlogged. When replacement makes more sense, select a vehicle-specific taillight designed for your exact application and get the fit right the first time.