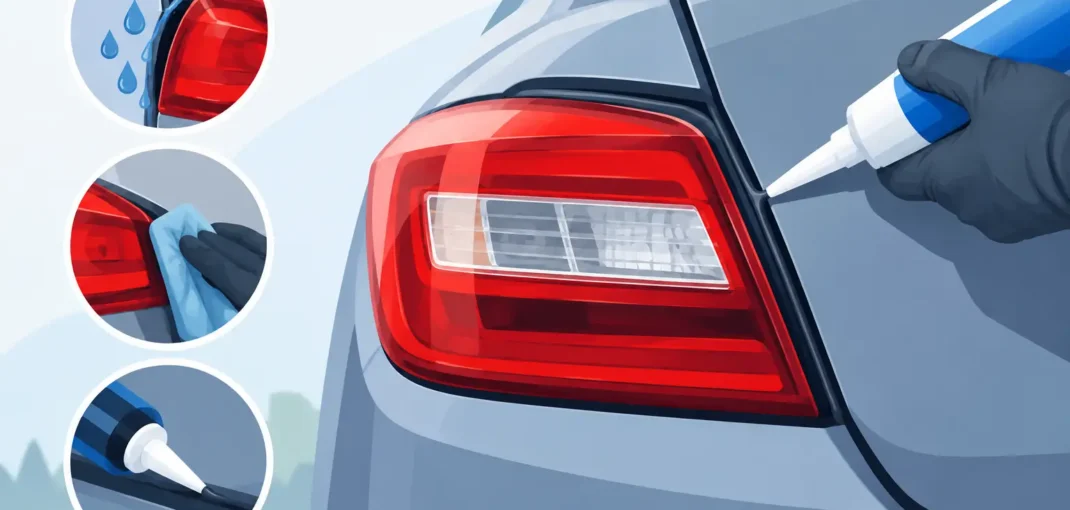
A wet carpet in the trunk, fogged taillight lenses, or water sloshing inside the housing is more than an appearance problem. Left alone, a taillight leak can corrode bulb sockets, damage connectors, trigger warning lights, and shorten the life of LED components. Knowing how to seal taillight leaks starts with finding the real entry point, because adding sealant to the wrong area can trap moisture instead of stopping it.
Most leaks come from a worn mounting gasket, a cracked lens or housing, loose hardware, or a body seam that lets water run behind the light. The right repair depends on which of those problems you find.
Find the Leak Before You Seal It
Do not start by applying silicone around the outside of the lens. That is a common quick fix, but it often hides the actual problem and makes future removal difficult. Remove the taillight assembly first so you can inspect the housing, gasket, mounting area, bulb sockets, and wiring.
Look for water trails, white or green corrosion, stained foam, cracked plastic, and rust around the mounting studs. If the trunk, cargo area, or rear cab panel is damp, inspect the sheet metal behind the light as well. On pickups, pay close attention to the bed-side mounting surface and the wiring pass-through. On SUVs and cars, check the trunk weatherstripping and nearby body seams.
A controlled water test helps when the source is not obvious. With the taillight installed loosely or held in position, have one person run a gentle stream of water over the area while another watches from inside the trunk or behind the panel. Start low and work upward. Avoid a high-pressure nozzle, which can force water through places rain normally would not reach.
If moisture is inside the lens but the mounting area is dry, the lens-to-housing seal is likely failing. If water appears behind the assembly, the gasket, body seam, mounting fastener, or wiring grommet is the more likely culprit.
Tools and Materials for Sealing Taillight Leaks
Have the repair supplies ready before you take the light apart. The exact materials depend on the leak, but most jobs call for the following:
- Clean microfiber towels and isopropyl alcohol
- Plastic trim tools and the correct socket or screwdriver
- A replacement taillight gasket or foam seal when available
- Automotive butyl tape for resealing a separated lens
- Automotive-grade RTV silicone for small exterior seams or grommets
- Dielectric grease for clean, dry electrical connectors
Butyl tape and RTV are not interchangeable. Butyl stays flexible and is the better choice for resealing many taillight lens housings. RTV cures into rubber and works well for small cracks, wire pass-throughs, and specific body-side seams. Use a product rated for automotive exterior use and follow its cure-time instructions.
Replace the Mounting Gasket First
A flattened, torn, or missing gasket is the most straightforward repair. Many factory and aftermarket taillight assemblies use a foam or rubber gasket between the housing and the vehicle body. Once that material loses its shape, water can travel behind the light and into the cargo area.
Remove the old gasket and clean both mating surfaces. Dirt, old adhesive, and wax can keep a new seal from sitting flat. Install a direct-fit replacement gasket if one is available for your year, make, and model. This is usually cleaner and more reliable than trying to build up an old gasket with silicone.
If a replacement gasket is not available, closed-cell automotive foam can work as a careful substitute. Match the original thickness as closely as possible, and do not block factory drain paths. Apply the foam evenly around the mounting perimeter, then reinstall the assembly without over-tightening the fasteners. Too much pressure can distort plastic housings and create another leak path.
For a Silverado, Sierra, Ford truck, Tahoe, Yukon, or Mustang with replacement lighting, verify that the housing is designed for the exact vehicle application. A nearly matching taillight may bolt in but still leave gaps around the body contour or mounting studs.
Check the Wiring Grommet and Mounting Studs
Water can follow a wire harness directly into the vehicle. Inspect the rubber grommet where the taillight wiring passes through the body. If it is split, hardened, or loose, replace it when possible. For a minor gap around an otherwise sound grommet, apply a small bead of automotive RTV on the body side after cleaning and drying the area.
Also inspect mounting studs and screw holes. A missing sealing washer or damaged stud area can let water pass through the housing. Seal only the specific opening that is leaking. Covering every fastener with silicone creates a mess and can make a simple bulb or taillight replacement frustrating later.
Reseal a Leaking Lens Housing
Condensation that returns after the taillight has been dried usually points to a compromised lens seal or a crack in the housing. First, inspect closely under bright light. Fine cracks often show up around mounting tabs, corners, and areas hit by road debris.
A cracked lens can sometimes be temporarily sealed with clear automotive RTV, but replacement is the better long-term move. Clear lens plastic expands and flexes with temperature changes. A patched crack may hold for a while, then open again after a cold night, a hot parking lot, or a rough road.
If the lens has separated from the housing and the assembly can be opened, remove the old sealant carefully. Warm the housing gradually if needed, working slowly with plastic tools to avoid warping the lens. Clean the sealing channel completely, then apply automotive butyl tape in a continuous, even bead. Press the lens and housing together firmly, checking that the seam is fully seated all the way around.
Do not use household caulk, glue, or expanding foam. These materials are not made for heat cycles, vibration, UV exposure, or serviceability. They can also release vapors that haze the inside of a lens.
Dry the Taillight Completely
Sealing a wet assembly locks moisture inside, which can fog the lens and accelerate corrosion. Remove bulbs if applicable, disconnect the wiring, and let the housing air-dry in a warm, dry area. A fan helps. You can use a hair dryer on low heat from a safe distance, but keep it moving and avoid overheating plastic or LED electronics.
For light condensation, leaving the assembly open overnight may be enough. For standing water, drain it first, dry the bulb sockets, and inspect every connector. If terminals are green, blackened, loose, or heat-damaged, replace the socket or pigtail before reinstalling the light. A dry lens does not solve an electrical connection that has already started corroding.
Once everything is dry, apply a light film of dielectric grease to the rubber seal area of a clean connector. Do not pack grease into terminal contact surfaces. Its job is to help keep moisture out around the connection, not to replace a damaged connector.
Reinstall and Test the Repair
Reinstall the taillight so it sits flush against the body. Tighten the fasteners evenly until the gasket is compressed, not crushed. Reconnect the harness and test the running lights, brake lights, turn signals, reverse lights, and any integrated LED functions before replacing interior trim.
After the sealant has cured according to the product instructions, repeat the gentle water test. Check inside the trunk, bed-side panel, or rear body cavity for fresh moisture. Then inspect again after the next rain or car wash. Catching a small seep early is far easier than repairing a soaked carpet, corroded module, or failed lighting assembly.
When Replacement Makes More Sense
Resealing is a solid repair when the housing is intact and the issue is a gasket, grommet, or separated seam. Replacement is usually the smarter value when the lens is badly cracked, the housing is warped, mounting tabs are broken, or water has repeatedly damaged the internal electronics.
This is also a good time to upgrade worn factory lighting. A vehicle-specific replacement taillight can restore a clean fit, improve rear visibility, and refresh the look of the truck, SUV, or car without dealing with an old housing that keeps taking on water. Select your vehicle carefully and match the model year, body style, and lighting configuration before ordering.
A dry taillight is not just cleaner-looking. It protects the wiring, keeps every rear light working when you need it, and lets your vehicle’s lighting upgrade do its job mile after mile.