
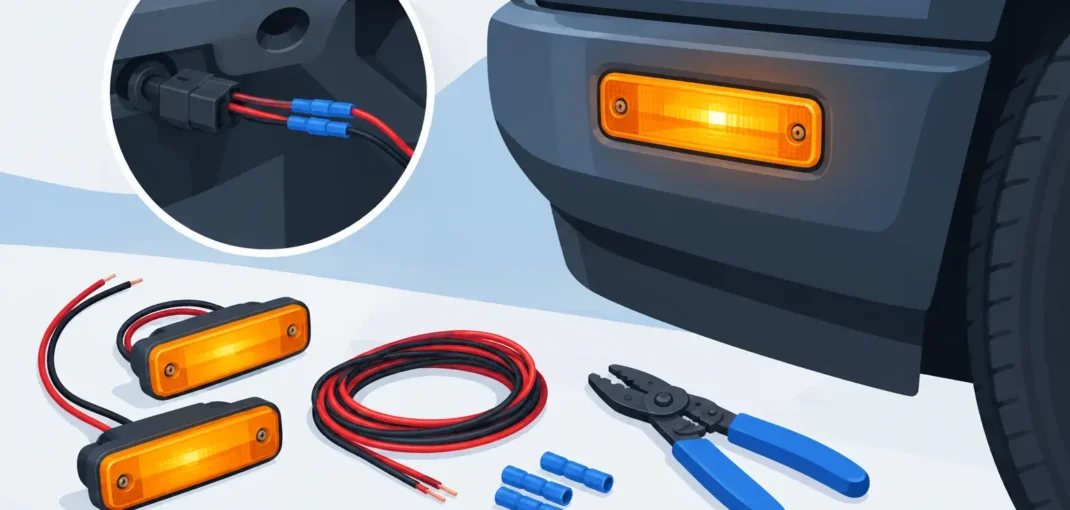
A new set of bumper markers can clean up the front end of a Silverado, Sierra, Ford truck, or SUV fast – but only if they illuminate when they should. Learning how to wire aftermarket bumper marker lights correctly prevents flickering, uneven brightness, blown fuses, and lights that stay on after the vehicle is parked. The goal is a factory-looking installation that works with your parking lights, not a bundle of exposed wire behind the bumper.
Before ordering or opening the package, confirm the marker lights are made for your vehicle’s year, make, model, bumper style, and intended mounting position. Direct-fit lights can reduce drilling and simplify the wiring route, while universal LED markers offer more flexibility but usually require more measuring, mounting, and wire protection.
Start With Fitment and a Wiring Plan
Bumper marker lights are often used as parking lights or side markers. Some aftermarket assemblies also provide a turn-signal function, a white daytime running light, or a switchback color setup. Do not assume every wire does the same job across brands. Check the instructions and identify each lead before connecting anything.
Most basic LED marker lights have a positive wire and a ground wire. A three-wire light commonly has a ground, a running-light positive, and a turn-signal or second-function positive. Wire colors vary by manufacturer, so use the product diagram first. If the diagram is missing or unclear, test the light with a fused 12-volt source before installing it on the vehicle.
Decide how you want the lights to operate. For a traditional marker-light setup, connect the positive lead to a parking-light circuit so the markers come on with the parking lights and headlights. If the light has a turn function, it needs a separate connection to the correct left or right turn-signal circuit. A DRL function may need an ignition-switched source instead.
It depends on the vehicle and the look you want. Tapping a parking-light wire is often the cleanest choice for amber bumper markers. Running lights directly to the battery can work, but only when the circuit includes a fuse and relay or switch designed for that purpose. A direct battery connection without control can leave the lights on and drain the battery.
Tools for Wiring Aftermarket Bumper Marker Lights
A careful installation does not require a full shop, but the right tools make a noticeable difference. Have a digital multimeter or test light, wire strippers, crimpers, heat-shrink butt connectors, dielectric grease, split loom, zip ties, and electrical tape ready. If you are adding a new fused circuit, use an inline fuse holder or an add-a-fuse that matches the vehicle’s fuse panel design.
For most LED marker-light installs, heat-shrink crimp connectors are a better long-term choice than quick-splice connectors. Quick splices are fast, but they can cut wire strands, loosen over time, and allow moisture into the connection. Soldered connections can also be reliable when done properly, but they still need heat shrink and strain relief. The best method is the one that produces a secure, sealed connection you can service later.
Disconnect the negative battery terminal before cutting, stripping, or joining vehicle wiring. This helps protect the vehicle’s electrical system and reduces the chance of accidentally shorting a circuit.
Find the Correct Vehicle Wire
Access the factory harness near the headlight, parking light, or existing bumper lamp. On many trucks, the best connection point is behind the headlight assembly or near the bumper harness. Remove only the trim, grille pieces, or fasteners needed to reach the wiring safely.
Use a multimeter to verify the circuit instead of relying only on wire color. With the battery connected temporarily, turn on the parking lights and probe the suspected wire. A parking-light wire should show power when the parking lights are on and lose power when they are off. Test turn-signal wires with the signal activated, looking for a pulsing voltage.
Once the circuit is identified, disconnect the battery again. Leave enough slack in the new marker-light wiring for bumper movement, service access, and a clean route around mounting brackets. Do not pull wires tight across sharp metal edges, radiator supports, or areas that may rub during normal driving.
Make Clean, Weather-Resistant Connections
Connect the marker light’s positive running-light wire to the verified parking-light positive wire. Connect its ground wire to a clean factory ground point or a bare-metal chassis location. If using a chassis ground, remove paint and corrosion from the mounting point, use a proper ring terminal, and tighten the fastener securely. A weak ground is one of the most common causes of dim LEDs and intermittent operation.
If your aftermarket bumper marker light includes a turn-signal lead, connect it to the correct turn circuit for that side of the vehicle. Keep left and right circuits separate. Combining them can create erratic flashing or feed power back into another lighting circuit.
After crimping each connection, heat the connector until it seals around the wire. Add a small amount of dielectric grease at exposed connector points where appropriate, then protect the completed harness with split loom. Secure the loom with zip ties, but do not cinch ties so tightly that they pinch the wires.
Keep every connection away from standing water, high heat, moving suspension parts, steering components, and the exhaust. Behind the bumper may look protected, but it still sees rain, road spray, salt, rocks, and wash water. Weather protection is not an extra step – it is what keeps an LED upgrade working after the first season.
Fuse New Circuits the Right Way
When marker lights are tied into an existing parking-light circuit, the factory fuse generally protects that branch as long as the added LED load is small. LEDs usually draw very little current, but check the light specifications and avoid adding more accessories than the circuit can handle.
If you are powering several lights from a new source, install a dedicated fuse close to the power source. Size the fuse for the wire gauge and expected current draw, not just the largest fuse that happens to fit. An oversized fuse may fail to protect the wiring in a short-circuit situation.
For larger custom lighting setups, use a relay. A relay lets a low-current factory lighting signal control a separate fused power circuit for the new lights. This is more work than a simple tap, but it is the smarter setup for multiple LED markers, auxiliary lighting, or a custom bumper build.
Test Before Reassembling the Bumper
Reconnect the battery and test every function before reinstalling trim or tightening the bumper hardware. Turn on the parking lights, headlights, hazard lights, and turn signals. Check the new lights from several angles, then confirm that the factory lamps still operate normally.
Look for dim output, flickering, rapid turn-signal flashing, or lights that glow when they should be off. Rapid flashing can happen when an LED turn-signal setup changes circuit resistance. Depending on the vehicle, the fix may be an LED-compatible flasher module, computer programming, or a load resistor. Load resistors get hot, so they must be mounted to metal away from plastic and wiring.
If one light does not work, start with the ground. Then verify polarity, inspect the crimp, and confirm that the tapped factory wire is the correct circuit. LED lights are polarity-sensitive in some applications, so reversing positive and negative may prevent operation without damaging the light.
Choose a Setup That Matches Your Build
Smoked lenses, black housings, clear lenses, and bright amber LEDs can all change the look of your front bumper, but styling should not come ahead of visibility and fitment. Check local lighting requirements, especially if you are changing marker colors, adding turn functions, or using tinted lenses on a street-driven vehicle.
For vehicle-specific upgrades, use year-make-model fitment before comparing lens color or LED style. Car and Truck Zone helps narrow the search for compatible replacement and upgrade lighting, so you can focus on the right bumper marker setup instead of trying to adapt a part that was not designed for your truck or SUV.
Take an extra few minutes to route, seal, and test the wiring before putting the bumper back together. A clean installation gives your vehicle the upgraded look you want – and keeps those marker lights dependable every time you switch on the lights.