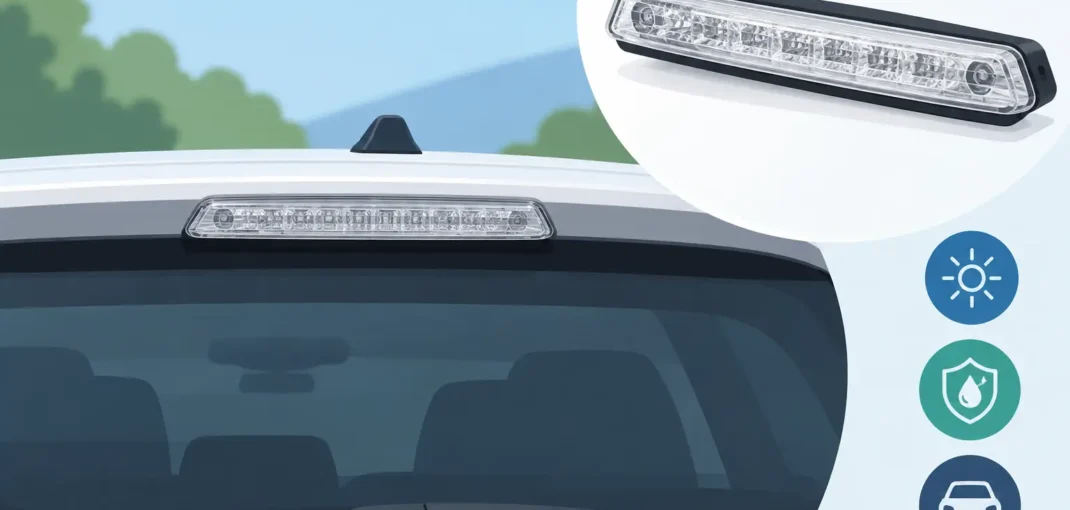
A clear lens third brake light is a small upgrade that can make a major difference at the rear of your vehicle. It replaces the factory center high-mounted stop lamp with a cleaner lens design, often paired with bright red LEDs, a black or chrome housing, and extra cargo-area illumination on many trucks and SUVs. The right unit refreshes worn factory lighting while giving your Chevy, GMC, Ford, or Mustang a sharper custom look.
Before choosing one, start with the details that matter most: exact year-make-model fitment, cab or body style, connector design, lens and housing finish, and whether the light includes cargo lamps. A third brake light may look universal in a photo, but mounting points, wiring plugs, and gasket shapes can change between model years and trim levels.
What a Clear Lens Third Brake Light Does
The third brake light sits high at the rear of the vehicle, usually above the rear glass, on the tailgate-area body panel, or at the top of a pickup cab. It activates with the brake pedal and provides an additional red warning light for drivers behind you. Because it is mounted higher than the taillights, it is especially useful in traffic, when a vehicle behind you may have a limited view of the lower lamps.
A clear lens does not mean the brake light shines white. The lens is clear on the outside, while the LEDs or internal light source still produce the required red brake-light output. This setup creates a clean, modern appearance when the lamp is off and a crisp red signal when braking.
Many truck applications also include white cargo lights. Those lamps point down toward the bed, making it easier to load tools, secure gear, or find equipment after dark. If cargo visibility is part of the reason for your upgrade, confirm that the replacement light includes this feature and that your vehicle’s factory wiring supports it.
Choosing the Right Clear Lens Third Brake Light
Fitment comes first. Select your vehicle by year, make, model, and applicable body style before comparing finishes or LED layouts. A 2014 Silverado third brake light, for example, is not automatically interchangeable with a 2019 Silverado, even if the trucks have a similar cab-mounted location. The same applies to GMC Sierra, Ford F-Series, Tahoe, Yukon, and Mustang applications.
Check whether the product is designed for your exact cab configuration. Regular cab, extended cab, and crew cab trucks can use different roof contours or lamp housings. On SUVs, rear liftgate and roofline designs can affect the lamp shape, mounting studs, and wire routing. Taking a minute to verify fitment can prevent a return and save time in the garage.
Housing color is the next styling decision. A black housing with a clear lens is a popular choice for blacked-out builds, tinted windows, dark wheels, and smoked taillights. Chrome or bright housing options can work better when you want to match factory trim, polished wheels, or chrome bumpers. The lens may be clear, but the housing is still a major part of how the light looks against your paint color.
LED configuration matters as well. LED third brake lights generally provide a fast, bright response and use less power than older incandescent-style designs. Look at the product photos and description to see how the red brake LEDs and white cargo LEDs are arranged. Some lights use a clean bar-style pattern, while others use individual LED pods for a more aggressive aftermarket look.
Do not buy based on appearance alone. A lower-priced light can be a good value, but sealing quality, gasket fit, connector style, and overall construction still matter. A lamp that sits on the cab roof or above the rear glass is exposed to rain, car washes, sun, road grime, and temperature swings. A properly shaped foam gasket and secure mounting design help keep moisture out of the housing and away from the mounting surface.
Clear Lens vs. Smoked Lens
A clear lens third brake light is usually the better match when you want a bright, clean look with a noticeable LED appearance. It works well with clear-lens taillights, chrome accents, white paint, silver paint, and builds where visibility is a top priority.
A smoked lens has a darker appearance when the lamp is off and can better match black headlights, smoked taillights, and blackout trim. The trade-off is straightforward: smoked styling can look more aggressive, but the lens is darker by design. For a daily-driven truck or SUV, choose a quality light with strong output and make sure its brake-light function remains clearly visible.
Installation Basics Before You Order
Most direct-fit third brake light replacements are manageable for a DIY owner with basic hand tools. Access is commonly through fasteners on the outside of the cab or liftgate area, followed by unplugging the factory connector and carefully removing the old housing. The exact process depends on the vehicle, so inspect your factory lamp location before the new part arrives.
Clean the mounting surface before installation. Dirt, old gasket material, and trapped moisture can keep the new gasket from sealing correctly. If the factory gasket has left residue behind, remove it carefully without damaging the paint. The new light should sit flat and even against the body panel, not rock from side to side or require excessive force to tighten.
Avoid overtightening the screws. The housing and lens are typically plastic, and too much torque can crack the mounting ears, distort the gasket, or strip factory screw locations. Tighten evenly until the light is secure and the gasket is compressed consistently around the perimeter.
Before putting tools away, test every function. Press the brake pedal or have someone help confirm the center brake LEDs illuminate. Turn on the cargo light switch if your vehicle has one, then verify both white cargo lamps work. Also check that the light sits straight and that no wiring is pinched behind the housing.
If your replacement uses a plug-and-play connector, installation is usually simple. If wiring modifications, resistor additions, or splicing are required, stop and confirm the product is intended for your application. A vehicle-specific light should match the factory connector and functions listed for that model whenever possible.
Common Problems to Avoid
Condensation is one of the most common concerns with exterior lighting. A small amount of temporary fogging can occur with changing temperatures, but standing water or repeated heavy moisture inside the lens points to a sealing issue. Check that the gasket is seated correctly, mounting screws are evenly tightened, and the housing is not cracked.
Another issue is choosing a light that physically fits but does not match the vehicle’s connector or cargo-lamp wiring. Product photos are helpful, but fitment information and connector details should drive the purchase. This is particularly important on trucks that changed electrical layouts between generation updates.
You should also avoid reusing damaged factory screws or installing a new lamp over a rough, corroded mounting area. Replace worn hardware when needed and make sure the lamp has a clean, stable mounting surface. A good-looking LED upgrade will not perform its best if it is loose, crooked, or exposed to water through a poor seal.
Find the Finish That Fits Your Build
For owners replacing a cracked factory lamp, a clear-lens option delivers a fresh OEM-plus appearance without changing the rest of the truck or SUV. For a more customized build, pair a black-housing clear lens light with LED taillights, a dark grille, cab roof lights, or other exterior upgrades that share the same finish.
Car and Truck Zone makes it easier to narrow the choices by vehicle application, model year, lens color, housing finish, and lighting type. Select your vehicle first, then compare the details that affect how the part installs and how it looks from the road.
The best choice is the one that fits your vehicle correctly, seals tightly, delivers clear brake-light visibility, and matches the style you want every time you walk up to the truck.